

『Flow Meter Picture Gallery: Visual Inspection Guide for High-Resolution Field Installations』Related information(flow rotameter|digital flow meter|balo meter|hydraulic flow meter|volumetric meter|positive displacement meter|pitot tube flow meter|displacement meter|cfm meter|variable area flow meter|inline flow meter|differential pressure flow meter|calibrated flow meter|velocity meter|paddle wheel flow meter|oval gear flow meter|anemometer hvac|multiphase flow meter|doppler flow meter|thorpe tube flowmeter|heat flow meter)
Flow Meter Picture Gallery: Visual Inspection Guide for High-Resolution Field Installations
Quick Answer: High-resolution field photos help you spot flow meter installation errors before they cause measurement drift or pipe failure. Silver Instruments shares a practical photo checklist for electromagnetic, Coriolis, ultrasonic, vortex, oval gear, and thermal mass flow meters. Send us your site photos and we return a free installation check with a recommended model or fix.
Most flow meter accuracy problems begin before startup. A visual check of a field installation can reveal misalignment, wrong ground wiring, short straight pipe runs, and sensor fouling. Our team built a flow meter picture gallery for this reason. Engineers and buyers across Southeast Asia, the Middle East, and Latin America use it to compare good and bad installations.
We have seen this on customer sites many times. A water treatment plant in Indonesia sent us a photo of an electromagnetic flow meter with a half-full pipe. The meter read 40 percent high. The fix was simple. Move the sensor to a lower point where the pipe stays full.
What to Check in a Flow Meter Photo
Check the flange bolts first. Uneven bolt torque shifts the sensor body and changes zero stability. Check the grounding ring on electromagnetic flow meters. A missing ground strap lets stray current enter the signal loop.
Check the upstream and downstream straight pipe. For a DN50 vortex flow meter, you need 15D upstream and 5D downstream. A 90 degree elbow before the meter creates swirl. Check the cable entries too. High-resolution photos often show water inside conduit glands. That causes 4-20 mA signal drop.
Check the label. Verify the model, K-factor, and calibration range match the pipe tag. In practice, most engineers skip this step. The label photo often saves a service trip.
Common Field Photo Mistakes
Many photos show a Coriolis flow meter installed with a reducer directly at the flange. That creates high velocity and stress on the tubes. For a 1 inch Coriolis meter measuring 0 to 500 kg/h, keep the reducer at least 10D upstream.
Another common mistake is a thermal mass flow meter in a vertical pipe with downward flow. The sensor element sits at the top and reads dry. Put the probe in the lower half of the pipe. A paint plant in Vietnam fixed this last year after we reviewed two smartphone pictures.
Rec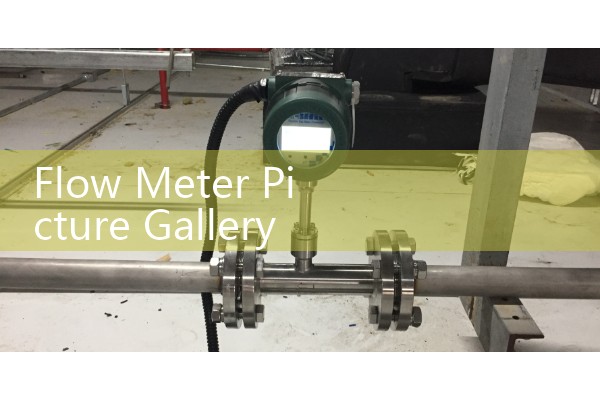
Silver Instruments supplies flow meters for harsh field sites. For seawater desalination plant feed lines, the SFE series electromagnetic flow meter with PTFE liner and 316L electrodes covers DN15 to DN600. It outputs 4-20 mA HART and RS485.
For diesel batching, the OG series oval gear flow meter handles viscosity up to 2000 cP with pulse output for a PLC. For high-temperature steam, the SVF series vortex flow meter works up to 350°C and 25 bar. For food oil and chemicals, the SCF series Coriolis mass flow meter measures kg/h, density, and temperature in one device.
How to Send Us Your Own Photos for a Free Check
Take three photos. One shows the full pipe run from 5 meters back. One shows the flow meter body and flange area. One shows the electrical cabinet and cable entry. Send the photos with your pressure (bar), temperature (°C), pipe size (DN), and flow range.
Use WhatsApp +86-25-52155837 or call +86-25-68650347. Our application engineers will reply with a 12 point visual report and a quoted model if replacement is needed.
FAQ
Can a photo replace an on-site flow meter audit? A high-resolution photo does not replace a full site audit. But it catches 70 percent of common installation faults. Pipe alignment, ground wiring, cable damage, and liner condition are visible in pictures.
What resolution do you need for a useful picture? At least 1200 x 1600 pixels. Keep the meter body in focus. Use a ruler or tape measure for scale when you photograph flange spacing.
Which flow meter type is easiest to inspect by photo? Electromagnetic and Coriolis meters show external faults clearly. Look for liner cracks, electrode stains, and stress on the housing.
Do you accept photos from all countries? Yes. We review photos from customers in Australia, Saudi Arabia, Chile, Nigeria, Indonesia, and Vietnam. Send them by WhatsApp or WeChat.
How long does a visual check take? Most reports are returned within 2 working days. Emergency requests go faster if you call the office directly.
Send us your site photos before you change the next sensor. Tell us the fluid, pressure (bar), temperature (°C), pipe size (DN), and flow range. WhatsApp +86-25-52155837, WeChat +86 15365082610, or call +86-25-68650347. Silver Automation Instruments at flow-meter.com.au and silverinstruments.com
 Hot Blog
 Related AD